
How to Use an 18% Gray Card for Exposure and White Balance
Quick Answer
Place an 18% gray card where your subject will be and make sure it receives the same light as the subject. Meter from a clean section of the gray surface to set exposure. Then use the card to set a custom white balance or capture a reference image for post-production. Repeat the process whenever the lighting changes. This simple workflow helps you achieve more consistent exposure, more natural color, and faster editing.
How to Use an 18% Gray Card for Exposure and White Balance
Auto exposure and auto white balance work well in many situations, but they do not always understand what you intend to photograph.
A white wedding dress can cause your camera to underexpose the scene. Dark clothing or a black background can make the camera overexpose the subject. Tungsten bulbs, fluorescent lights, colored walls, and mixed lighting can also produce yellow, green, blue, or magenta color casts.
An 18% gray card gives your camera a consistent neutral reference. You can use it to establish exposure, set white balance, create a reference for editing, and improve color consistency across a complete photo or video session.
The process only takes a few moments, but it can save considerable correction time later.
What Is an 18% Gray Card?
An 18% gray card provides a neutral midtone reference for photography and video. Photographers commonly use it to:
Measure exposure
Set a custom white balance
Create a neutral reference for editing
Match color across multiple cameras
Check lighting consistency
Establish focus when the card includes a focusing target
A standard gray card usually provides one neutral gray surface. A dual-sided gray card reflector adds a white side that can support white balance and reflect a small amount of light onto a subject.
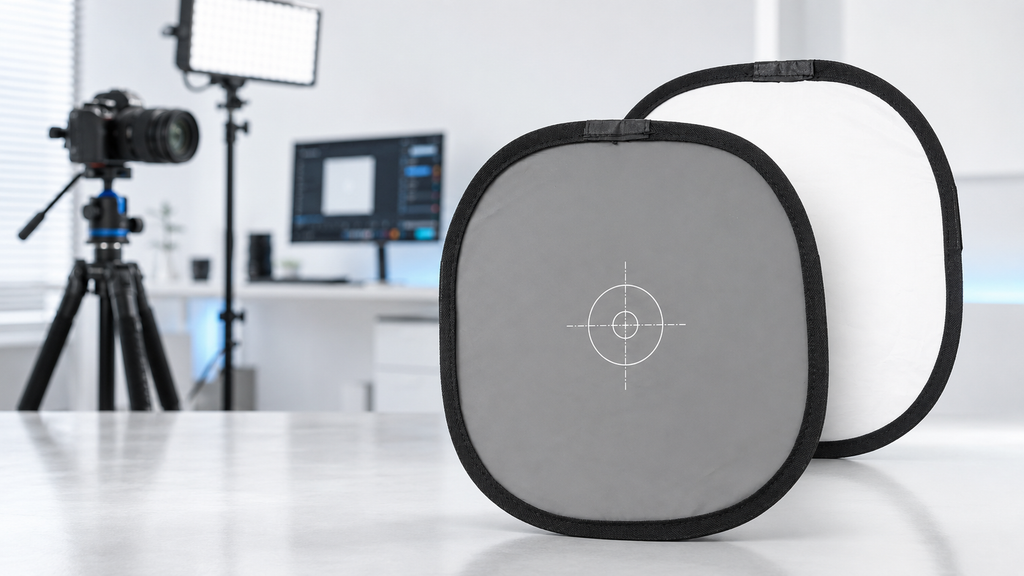
Some collapsible models also include a high-contrast target in the center. That target gives autofocus systems a clear point to recognize, making the card useful for product setups, studio work, and self-recorded videos.
Because a gray card does not connect electronically to your camera, it works across major camera systems, including Canon, Nikon, Sony, Fujifilm, Olympus, Pentax, Panasonic, and others. You can also use one with cinema cameras, camcorders, and smartphones that support manual controls.
Why Cameras Sometimes Miss Exposure and White Balance
Your camera measures light, but it does not understand whether the subject should appear bright, dark, warm, or cool.
Bright and Dark Subjects Can Affect Exposure
A camera meter evaluates reflected light. Large bright or dark areas can influence its reading.
For example:
A white wedding dress may appear too dark because the camera tries to reduce the brightness.
A person wearing black against a dark wall may appear too bright because the camera tries to lift the scene.
A backlit portrait may leave the subject’s face underexposed.
Reflective product packaging may cause the camera to reduce the overall exposure.
A gray card gives you a controlled reference that does not depend on the brightness of the subject.
Mixed Lighting Can Affect White Balance
Auto white balance looks for neutral information in the scene. It may struggle when the image contains:
Warm tungsten bulbs
Green-tinted fluorescent lighting
LEDs with different color temperatures
Daylight mixed with indoor lighting
Colored stage lights
Reflections from painted walls or bright clothing
A gray card shows the camera or editing software what a neutral surface should look like under the current light.
How to Position a Gray Card Correctly
Correct placement matters more than the size of the card or the brand of camera.
Place the card at the subject’s position and make sure it receives the same light as the subject. If the subject stands several feet away from the camera, holding the gray card next to the camera may produce a different reading.
Use these positioning guidelines:
Put the card where the subject will stand or where the product will sit.
Make sure the same key light illuminates both the card and the subject.
Aim the card generally toward the camera.
Keep your hands, body, or camera from casting a shadow across it.
Adjust the angle slightly if the surface shows glare.
Avoid reflections from colored walls, clothing, signs, or decorative lighting.
For a portrait, hold the card close to the subject’s face. For product photography, place it next to the product. For a talking-head video, position it where your face will appear.
The card must represent the light that actually reaches the subject.
How to Use an 18% Gray Card for Exposure
The gray side provides a practical exposure reference when bright or dark subjects might confuse the camera meter.

Step 1: Choose Your Basic Camera Settings
Manual exposure mode usually gives you the most consistent result because the camera will not change the exposure after you remove the card.
Choose your settings based on the creative and technical needs of the shot:
Set the aperture for the depth of field you want.
Set the shutter speed to control movement.
Adjust ISO to reach an appropriate exposure.
You can also meter in aperture priority or shutter priority mode, but lock the exposure before removing the card.
Step 2: Place the Card in the Subject’s Light
Put the gray card where the subject will be.
Make sure the window, flash, LED panel, or other key light strikes the card in the same way it strikes the subject. Do not measure the card under one light source and photograph the subject under another.
Step 3: Meter From a Clean Gray Area
Choose spot or partial metering when your camera offers it. Aim the metering area at a clean, plain section of the gray surface.
Avoid metering from:
The printed focusing target
White markings
The dark edge or border
A stained or damaged area
A visible glare spot
Move closer or zoom in until the plain gray surface fills the metering area.
Step 4: Adjust the Exposure
Adjust your shutter speed, aperture, or ISO until the exposure indicator reaches the desired position.
Use that reading as a reliable starting point, then take a test photograph. Review the histogram and check important highlight areas.
Pay particular attention to:
White dresses
Bright skin highlights
Reflective labels and packaging
White plates or tablecloths
Clouds and bright windows
A gray card improves consistency, but you should still evaluate the actual image.
Step 5: Lock the Settings and Remove the Card
Keep the exposure settings unchanged after you remove the card. You can now photograph the subject under the same lighting.
Repeat the process when:
The subject moves into different light
Clouds change the outdoor brightness
You enter another room
You reposition a light
You change flash power
You change the distance between the light and subject
How to Use a Gray Card for White Balance
A custom white balance tells your camera which color should appear neutral under the current lighting.
Camera manufacturers use different menu systems. Some cameras ask you to photograph a neutral reference and select that image in the menu. Others measure the card directly through a custom white balance mode.
Check your camera manual for the exact menu steps, then follow this general process.

Step 1: Position the Card Under the Subject’s Light
Place the gray card at the subject’s position. Make sure it receives the same light as the subject.
Mixed lighting requires extra attention. If daylight illuminates one side of a person’s face and a warm lamp illuminates the other, one white balance setting cannot completely neutralize both sides.
In that situation, decide which light source should control the look or adjust the lighting before setting white balance.
Step 2: Fill the Measurement Area
Move close enough for the neutral surface to fill most of the frame or the area your camera uses for its custom white balance measurement.
Keep the printed target and border outside the measurement area when possible.
Step 3: Capture a Properly Exposed Reference
The card must remain bright enough for the camera to read, but it should not clip.
The gray side usually gives you more protection against overexposure. When you use the white side, confirm that it still contains detail and color information.
Step 4: Set the Custom White Balance
Use your camera’s custom white balance feature to measure the card or select the reference image.
Confirm that your camera now uses the custom setting rather than Auto White Balance.
Take a test photo and check:
Skin tones
White clothing
Neutral-colored products
Gray backgrounds
Areas that previously looked too yellow, blue, green, or magenta
Step 5: Repeat When the Lighting Changes
White balance depends on the light source. Create a new reference whenever the lighting changes.
Common examples include moving:
From outdoors to indoors
From direct sunlight to shade
From a lobby to a ballroom
From window light to LED lighting
From one studio lighting setup to another
How to Use a Gray Card in Post-Production
You do not have to set a custom white balance in the camera. You can photograph the gray card and use that image as a neutral reference during editing.
This method works especially well with RAW files.
A Simple Editing Workflow
Place the gray card in the scene at the beginning of the lighting setup.
Take one properly exposed reference image.
Remove the card and continue shooting.
Import the images into your editing software.
Open the photograph that contains the gray card.
Select the white balance eyedropper.
Click a clean section of the gray surface.
Review the corrected color.
Apply or synchronize the white balance setting across images taken under the same light.
This process works in editing applications that provide a neutral white balance selector.
Do not apply one correction to images captured under several different lighting conditions. Create a separate gray card reference for each room, lighting setup, or significant change in daylight.
Should You Use the Gray Side or White Side?
The gray and white sides support different tasks.

When you use the white side for white balance, check that the surface has not overexposed. When you use the gray side, meter or sample from a plain area rather than the printed target.
Gray Card Workflow by Shooting Scenario

Common Gray Card Mistakes
Placing the Card in Different Light
The card must receive the same light as the subject. A card held next to the camera may not represent a subject standing several feet away.
Place the card at the subject position whenever possible.
Allowing Glare on the Surface
Strong reflections can make the card appear brighter and less neutral. Adjust the angle slightly until the glare disappears while keeping the card under the same key light.
Metering From the Printed Target
White target lines and dark borders can affect a tight spot-meter reading.
Aim at an unprinted section of the gray surface.
Overexposing the White Side
An overexposed white surface loses useful color information. Reduce the exposure or use the gray side instead.
Using One Reference All Day
Indoor lighting and daylight can change throughout a shoot. Capture a new reference after changing rooms, repositioning a light, adjusting flash power, or moving between sunlight and shade.
Allowing Colored Reflections to Reach the Card
Bright clothing, colored walls, and illuminated signs can influence the card. Change the card’s position or angle to reduce those reflections.
Using a Dirty or Faded Card
Fingerprints, stains, fading, and surface wear can affect the reference. Keep the card clean and replace it when you can no longer find a clean neutral area.
Expecting One Card Reading to Fix Mixed Lighting
One white balance setting cannot fully neutralize two very different light sources at the same time. Control the lighting, choose the dominant source, or correct separate areas during editing.
Gray Card vs. Other Exposure and Color Tools

A gray card does not need to replace every specialized tool. It provides a fast, practical solution when you need a reliable exposure and color reference without adding several accessories to your bag.
Why a Collapsible Gray Card Can Be More Practical
A small rigid gray card can handle basic exposure and white balance work, but real shoots often require more flexibility.
A collapsible dual-sided gray card offers several practical advantages.
A Larger Reference Area
A larger surface makes it easier to fill the camera’s metering or white balance measurement area. It also remains more visible when you place it farther from the camera.
A Clear Focusing Target
A center target gives the autofocus system a high-contrast point to recognize. It can help during:
Product photography setups
Studio pre-focusing
Self-recorded video
Interviews
Tabletop demonstrations
A White Reflecting Surface
The white side can reflect a small amount of light onto a face, food item, or small product. It cannot replace a full-size reflector, but it provides quick fill when you need a compact solution.
Easier Storage
A pop-up card collapses into a smaller size, making it easier to carry in a camera bag. A storage sleeve protects the surface from dirt and damage.
No Batteries or Camera-Specific Connection
A gray card works as an optical reference. It does not require batteries, cables, apps, or a dedicated connector.
You can use the same card when you change camera brands or upgrade your equipment.
Recommended Product: Foto&Tech Gray Card Reflector Focusing Board
The Foto&Tech Gray Card Reflector Focusing Board combines exposure, white balance, focusing, and small-area reflection in one portable accessory.
The 18% gray side gives photographers a consistent reference for exposure and color correction. A high-contrast target in the center provides a clear point for autofocus, pre-focusing, and camera setup.
The white side supports custom white balance workflows and can reflect light onto a face, tabletop subject, food item, or small product.
The collapsible design makes the panel easier to carry than a large rigid board. Fold it down, secure it with the included elastic tie, and place it inside the zippered nylon storage sleeve.
Key Foto&Tech Gray Card Advantages
18% gray exposure reference
Use the gray surface to create a consistent exposure starting point when bright or dark subjects affect your camera meter.
Dual-sided white balance workflow
Use the neutral gray surface or white side to set a custom white balance or capture a reference image for post-production.

High-contrast center focusing target
Give your camera a clear point to focus on before a portrait, product shoot, interview, or self-recorded video.
Small-area reflection
Use the white side to soften light shadows on faces, food, and smaller products.

Collapsible, camera-bag-friendly construction
Carry a larger working surface without making space for a rigid board.
No electronic compatibility restrictions
Use the card with Canon, Nikon, Sony, Fujifilm, Olympus, Pentax, Panasonic, and other camera systems. It also works with video cameras and compatible smartphone camera apps.
Complete storage package
The package includes:
One Gray Card Reflector Focusing Board
One elastic cable tie
One nylon zippered storage sleeve

How Does the Foto&Tech Gray Card Compare?

About Foto&Tech
Great photography does not stop at the camera.
Every successful shoot depends on the accessories that keep the workflow running—from remote shutters, camera cables, and cleaning tools to lighting accessories, mounting solutions, and color-control equipment.
Foto&Tech curates practical camera accessories for photographers, professionals, and content creators who value dependable performance, clear compatibility information, fair pricing, and fast delivery.
We help you find reliable accessories without unnecessary brand-name markups, so you can spend more time creating and less time searching for the right supporting gear.
Foto&Tech offers:
Free Standard Shipping
A 100% Money-Back Guarantee
Genuine Product Guarantee
Fast delivery from US warehouses
Compatibility guidance across major camera brands
We curate, you discover.
Don’t Forget Your Accessories.

Frequently Asked Questions
1. Can an 18% gray card set both exposure and white balance?
Yes. Use the gray surface as a midtone reference for exposure and as a neutral reference for in-camera white balance or post-production color correction.
2. Which side should I use for white balance?
Both neutral gray and white surfaces may work, depending on your camera. The gray side often gives you more protection against overexposure. Follow your camera’s custom white balance instructions.
3. Does the gray card need to fill the entire frame?
Not always. It needs to cover the area your camera uses for metering or custom white balance measurement. Move closer or zoom in when necessary.
4. Do I still need a gray card when I shoot RAW?
RAW files give you more white balance flexibility, but they do not provide an automatic neutral reference. A gray card helps you correct and synchronize a group of images more consistently.
5. How often should I photograph the gray card?
Capture a new reference whenever the light changes. Repeat the process after entering another room, moving a light, changing flash power, or moving between sunlight and shade.
6. Can I use a gray card for video?
Yes. Use it to set manual exposure and white balance before recording. A card with a printed target can also help you pre-focus when filming yourself.
7. Can I use a gray card with a smartphone?
Yes, especially when the camera app provides manual exposure, focus, or white balance controls. You can also include the card in a reference image and use it during editing.
8. Can I use white paper instead of a gray card?
Ordinary white paper may contain optical brighteners or a slight color tint, and it can overexpose easily. A photography gray card provides a more controlled reference.
9. Can a gray card replace a light meter?
A gray card provides a useful reflective metering reference, but it does not fully replace an incident light meter in complex professional lighting setups.
10. Can a gray card replace a professional color checker?
No. A gray card provides a neutral reference. A professional color checker includes several color patches for advanced matching and camera profiling.