
Is Your Flash Trigger Misfiring?
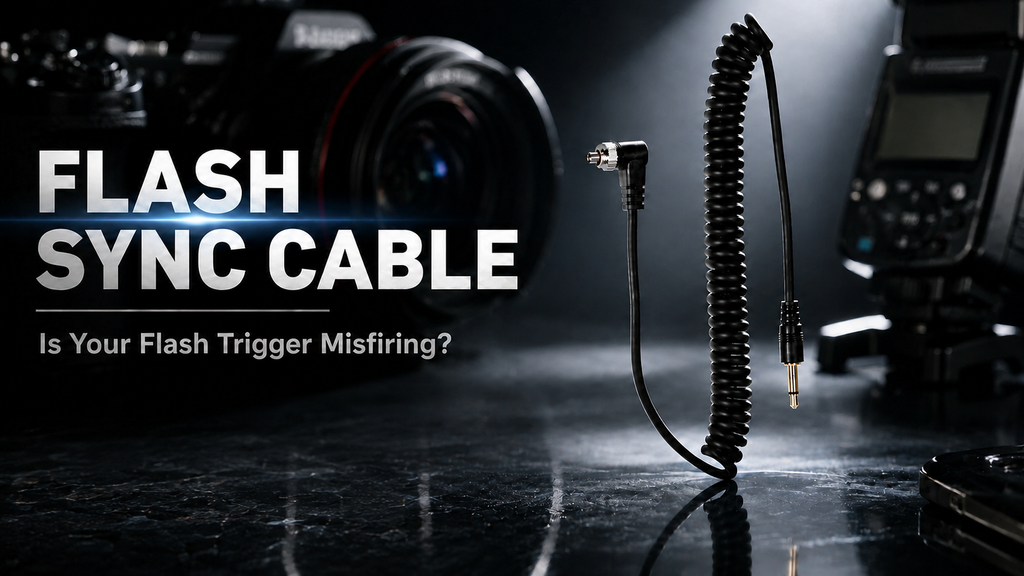
A flash misfire can interrupt a portrait session, slow down a product shoot, or cause a photographer to miss a frame that cannot be repeated. In many cases, the flash and wireless trigger still work correctly. The small cable between them causes the problem.
A correctly matched 3.5mm to PC Sync cable creates a direct trigger connection between compatible equipment. It can solve mismatched ports, reduce accidental disconnections, and provide more flexibility when positioning a wireless receiver or studio light.
Before replacing a flash, receiver, or complete trigger system, check whether the sync cable has become the weakest part of the lighting workflow.
Why Does a Flash Misfire During a Shoot?
When a flash stops firing, photographers often check the batteries, wireless channel, and trigger settings first. Those checks matter, but the physical sync connection can create the same symptoms.
A loose, damaged, strained, or incorrectly matched cable can cause intermittent triggering even when every device has sufficient power.
Loose PC Sync Connections
A standard PC Sync plug generally relies on friction to remain connected. The small connector can loosen when a photographer:
Moves a light stand
Adjusts a wireless receiver
Changes the strobe angle
Pulls or reroutes the cable
Installs or packs equipment quickly
A slightly loose connector may not stop the flash completely. It may work during a test, miss during the actual photograph, and start working again after the photographer touches or reseats the cable.
This intermittent behavior makes the problem difficult to diagnose.
Flash Equipment Uses Different Sync Ports
Cameras, wireless triggers, receivers, and flashes do not share one universal sync connector.
Common connections include:
2.5mm sync ports
3.5mm sync ports
Standard PC Sync terminals
Threaded PC Sync terminals
Brand-specific connectors
Hot-shoe connections
USB or other data ports
For example, a wireless receiver may provide a 3.5mm sync output, while a studio strobe accepts only a PC Sync input.
Both devices may work correctly, but they cannot connect directly without the right cable. A 3.5mm to PC Sync cable bridges that specific connection.
A Short or Strained Cable Restricts Light Placement
A short cable may work while the equipment remains still. Problems can begin when the photographer raises the light stand, changes the strobe angle, or moves the receiver.
A cable under constant tension may:
Pull against both equipment ports
Disconnect when the light stand moves
Restrict receiver placement
Place unnecessary stress on the sockets
Catch on nearby equipment
Develop internal damage after repeated stretching
Straight Plugs Can Protrude From the Device
A straight plug extends outward from a trigger or receiver. This position increases the chance of impact and can place sideways leverage on the socket.
Why Replacing the Cable May Be More Practical Than Replacing the System
Loose connections, limited cable reach, and occasional flash misfires may seem like small problems, but they can disrupt an entire session.
A studio photographer should not need to reseat a connector every few frames. A commercial photographer should not have to change a carefully arranged light position because the cable cannot reach.
These problems do not always require a new flash, receiver, or wireless trigger system.
When the main equipment still works, the practical solution may be a cable with the correct connectors, a more secure design, and enough working length.
The original cable may:
Use the wrong connector size
Have a loose PC Sync plug
Be too short for the current light position
Use a plug shape that interferes with mounting
Have an intermittent internal connection
This is where a 3.5mm to PC Sync coiled cable becomes useful. It connects two different sync interfaces while addressing several physical problems that affect real photography workflows.
How a 3.5mm to PC Sync Cable Solves Common Connection Problems
This cable carries a basic firing signal between a compatible 3.5mm flash sync port and a PC Sync terminal.
It usually does not replace a wireless trigger system. Instead, it connects the wireless receiver to the flash or strobe.

How to Check Compatibility Before Buying
Check the ports before checking the brand name.
Broad statements such as “compatible with Canon, Nikon, and most DSLR cameras” do not prove that the cable will work with every model.
Compatibility depends on:
Connector size
Port function
Signal direction
PC Sync terminal design
Intended equipment workflow

Not Every 3.5mm Port Is a Sync Port
Microphone, headphone, camera remote, and flash sync sockets can share a similar physical size while using different wiring and signals.
Look for labels such as:
Sync
Flash Sync
Trigger Out
Flash Out
PC
External Flash
Connect the trigger or receiver output to the flash input.
A cable cannot turn an audio port or shutter-release port into a flash sync port. It also cannot make two output-only ports work together.
How to Install and Use a 3.5mm to PC Sync Cable
Once you confirm both ports, installation should take only a few minutes.
Step 1: Turn Off the Connected Equipment
Turn off the flash, wireless receiver, transmitter, and other connected equipment.
The cable does not require power, but switching the equipment off helps prevent accidental firing and makes it easier to inspect each connection.
Step 2: Connect the 3.5mm Plug
Insert the right-angle 3.5mm plug into the compatible flash sync output on the wireless receiver, trigger, or other device.
Before inserting it, confirm that the port supports flash synchronization rather than:
Microphone input
Headphone output
Camera shutter release
Another audio or data function
The correct port may carry a label such as “Sync,” “Flash Sync,” “Trigger Out,” or “Flash Out.”
Step 3: Connect the PC Sync Plug
Insert the PC Sync plug into the sync input on the flash, studio strobe, or other compatible device.
When the equipment provides a threaded PC Sync terminal, tighten the locking collar gently by hand.
The collar helps reduce loosening caused by movement or light cable tension. Do not use tools or overtighten it, as excessive force may damage the port or thread.
Step 4: Leave Enough Cable Slack
Position the receiver and flash so the coil retains some slack.
Do not keep the cable fully stretched for long periods. Continuous tension can increase stress on the plugs, equipment sockets, and internal wiring.
Step 5: Power On and Test the Setup
Turn on the flash, wireless receiver, and transmitter. Then press the trigger’s test button.
Before the shoot:
Fire the flash several times to confirm consistent operation.
Move the receiver and light stand slightly, then test again.
Check that both connectors remain secure.
Take several test photographs to confirm flash synchronization.
When the flash still does not fire, check the batteries, wireless channel, group settings, signal direction, and port functions.

Common Installation Mistakes

Functions This Cable Does Not Provide
A 3.5mm to PC Sync cable normally carries a basic flash firing signal.
It does not automatically provide:
TTL automatic flash exposure
High-speed sync
Remote flash power adjustment
Autofocus control
Camera shutter release
Firmware or data transfer
Audio transmission
Good Camera Accessories Start With Clear Compatibility
Photographers shopping for a flash sync cable need clear answers to three questions:
Do the connectors fit the existing equipment?
Will the connection remain secure during the shoot?
Does the cable suit the actual lighting arrangement?
A broad statement such as “compatible with most cameras” does not answer those questions accurately.
For sync cables, remote releases, and flash accessories, compatibility depends on the exact connector, signal type, direction, and usage scenario.
This practical approach guides how Foto&Tech selects and explains camera accessories.
Foto&Tech focuses on clarifying:
Which connectors the product uses
Which types of equipment it can connect
Which photography workflows it supports
Which functions it provides
Which functions it does not provide
What the photographer should check before ordering
Clear compatibility guidance helps photographers choose the correct accessory before the shoot. It can also reduce avoidable returns, setup delays, and on-location troubleshooting.
Find the Right Flash Sync Cable at Foto&Tech
The best sync cable is not necessarily the one with the most features. It is the cable that correctly connects the existing equipment and supports the intended workflow.
The Foto&Tech store offers more than this single 3.5mm to PC Sync cable.
Photographers can also explore other connector combinations, plug designs, and cable lengths for different cameras, wireless triggers, receivers, and studio flashes.
When comparing options, check:
2.5mm versus 3.5mm ports
PC Sync input requirements
Threaded versus non-threaded PC Sync terminals
Straight versus coiled cables
Straight versus right-angle plugs
The working distance required by the lighting arrangement
Shopping by connector type and shooting scenario provides more accurate results than shopping by camera brand alone.
When this 3.5mm to PC Sync model does not match the equipment, visit the Foto&Tech store to compare other flash sync cable models and choose the correct connection.
Foto&Tech offers:
Clear compatibility information
Free standard shipping
A 100% money-back guarantee
A genuine product guarantee
Fast delivery from US warehouses
We curate, you discover.
Don’t Forget Your Accessories.

Frequently Asked Questions
What Is a 3.5mm to PC Sync Cable Used For?
It connects a compatible device with a 3.5mm flash sync output to a flash or studio strobe with a PC Sync input. Photographers commonly use it between a wireless receiver and a studio flash.
Will This Cable Work With Every DSLR Camera?
No. Compatibility depends on the available ports and their functions. Many DSLR and mirrorless cameras do not provide a 3.5mm flash sync output.
Is a 3.5mm Flash Sync Cable the Same as an Audio Cable?
Not necessarily. The plugs may share the same physical size, but the internal wiring and intended functions can differ. Use a cable specifically designed for flash synchronization.
Does This Cable Support TTL Flash Control?
The available product information describes a basic sync cable. It carries a firing signal rather than full TTL communication.
Does a PC Sync Cable Support High-Speed Sync?
A basic PC Sync connection does not automatically provide high-speed sync. HSS depends on the camera, flash, trigger system, and communication method.
Why Does the PC Sync Connector Have a Screw Lock?
The locking collar attaches to a compatible threaded PC Sync terminal. It helps reduce connector movement and accidental disconnection.
How Long Is the Coiled Cable?
The listed specifications state that the cable measures approximately 14 inches when relaxed and extends to approximately 54 inches.
Can I Use This Cable With a PocketWizard Trigger?
The product information lists PocketWizard Plus III and Plus II among the intended applications. Check the exact PocketWizard port and the connection required by the flash before ordering.
Can the Cable Connect a Camera Directly to an External Flash?
It can only do so when the camera provides a compatible flash sync output and the flash accepts PC Sync input. Many photographers use the cable between a wireless receiver and the flash instead.
What Should I Buy When My Device Does Not Have a 3.5mm Port?
Foto&Tech offers other flash sync cable connector types and models. Check whether the equipment uses 2.5mm, 3.5mm, PC Sync, or another connection before selecting the cable.