
How to Make a Tripod More Stable: 10 Practical Tips for Sharper Photos
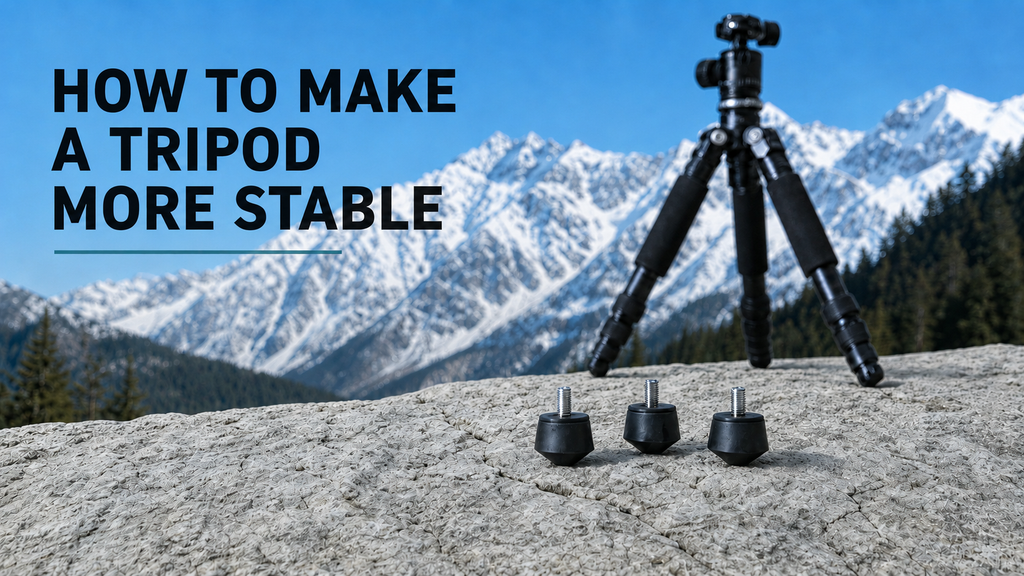
Using a tripod doesn’t automatically guarantee sharp photos. You can carefully frame the shot, lock every leg, and still end up with unwanted blur or movement.
Sometimes the cause is obvious, such as strong wind or loose ground. Other times, it comes from something easy to overlook: an overextended center column, a loose quick-release plate, a swinging camera strap, or worn tripod feet that no longer grip the floor.
Tripod stability depends on the entire support system—from the camera mount at the top to the three small contact points at the bottom. Whether you’re shooting long exposures, landscapes, architecture, products, video, or macro subjects, these practical tips can help you reduce camera movement and create a more stable setup.
Why Is My Camera Still Shaking on a Tripod?
Before changing your equipment, it helps to identify where the movement is coming from.
Common causes include:
Setting up on unstable or vibrating ground
Extending the tripod higher than necessary
Raising the center column too far
Extending the thinnest leg sections first
Leaving a leg lock or head control partially loose
Placing too much weight on the tripod
Letting a camera strap or accessory move in the wind
Pressing the shutter button by hand
Using worn, damaged, or unsuitable tripod feet
Allowing a hanging camera bag to swing beneath the tripod
Some of these problems can be corrected in seconds. Others may require a different setup or a small replacement part.
1. Start With Firm, Stable Ground
A tripod can only be as stable as the surface beneath it.
Before extending the legs, inspect the ground and look for a firm place to set up. Avoid positioning the tripod on loose rocks, unstable boards, soft soil, thick vegetation, or anything that moves when you step on it.
Indoor floors can also create problems. Temporary stages, pedestrian bridges, raised platforms, and some wooden floors may vibrate when people walk nearby. Even when the tripod doesn’t appear to move, those vibrations can travel through the legs and reach the camera.
When possible:
Move away from heavy foot traffic.
Avoid placing the tripod across two different surfaces.
Test the ground by gently applying pressure before mounting the camera.
Reposition the legs if one foot rests on a loose object.
Wait for nearby movement to stop before starting a long exposure.
If you must shoot from a vibrating surface, time the exposure carefully and avoid touching the setup while the shutter is open.
2. Keep the Tripod as Low as the Shot Allows
A taller tripod is generally more exposed to wind, vibration, and accidental contact. Raising the camera also raises the center of gravity, which can make the setup less stable.
That doesn’t mean every photograph should be taken from ground level. Camera height is part of composition, and the correct shooting position should always come first. However, there’s no reason to extend the tripod higher than the shot requires.
For a more stable setup:
Use only the height needed for the composition.
Spread the legs fully into their locked positions.
Lower the tripod when shooting in strong wind.
Avoid extending every leg section just because it is available.
Keep the camera centered over the tripod whenever possible.
A slightly lower shooting position can make a noticeable difference when using a long lens or making a multi-second exposure outdoors.
3. Avoid Raising the Center Column Too High
The center column is convenient when you need a small height adjustment, but fully extending it can reduce stability.
With the column raised, the camera is supported farther above the point where the tripod legs meet. The setup begins to behave more like a monopod positioned on top of a tripod, making it more sensitive to vibration and wind.
For better stability:
Keep the center column fully lowered whenever possible.
Use the tripod legs to reach the main working height.
Raise the column only as much as the composition requires.
Avoid fully extending it in strong wind.
Check that the center-column lock is completely tightened.
A raised center column may be acceptable for a quick photo in calm conditions. For long exposures, macro work, telephoto photography, or critical video shots, keeping it low is usually the safer choice.
4. Extend the Thickest Leg Sections First
Most full-size tripods use several nested leg sections. The upper sections are thicker, while the lowest sections are usually the thinnest.
If you don’t need the tripod at full height, extend the thickest sections first. Thicker leg tubes generally provide greater rigidity and are less likely to flex.
A practical extension order is:
Extend the largest upper leg sections.
Lock each section completely.
Use the thinner lower sections only if additional height is necessary.
Keep the amount of extension similar across the three legs when shooting on level ground.
On uneven terrain, the legs may need different lengths. That is normal. The priority is to create three secure contact points while keeping the camera platform properly positioned.
5. Adjust Each Leg to Match the Terrain
Tripod legs don’t always need to be identical in length.
On a slope, staircase, rocky surface, or other uneven location, forcing all three legs to match can leave one foot without secure contact. Instead, adjust each leg independently so all three feet rest firmly on the ground.
When setting up on uneven terrain:
Place each foot on the most secure available surface.
Adjust individual leg lengths rather than forcing the tripod to remain symmetrical.
Use the leg-angle controls when additional clearance is needed.
Make sure every angle lock is fully engaged.
Position one leg downhill when the terrain and tripod design make that arrangement safer.
Test the setup gently before attaching heavy equipment.
Don’t place a tripod leg on a loose stone simply to make all three legs look even. A stable, asymmetrical setup is better than a perfectly symmetrical tripod resting on unreliable ground.
6. Use the Right Tripod Feet for the Surface
Tripod feet are easy to overlook, but they form the final connection between the legs and the ground. The wrong feet can slide on hard surfaces, sink into soft ground, or damage indoor flooring.
Rubber feet and metal spikes provide stability in different ways, and both can be used outdoors.
Rubber tripod feet rely on friction and their flexible, slip-resistant surface. They are suitable for a wide range of indoor and outdoor conditions, including:
Wood flooring
Tile and laminate
Carpet and studio floors
Concrete and pavement
Dry rock
Gravel paths
Grass
Firm soil
Mildly uneven outdoor ground
A rubber foot with a rounded or blunt cone-shaped bottom can adapt to small surface irregularities, helping the tripod remain stable on both firm surfaces and outdoor terrain. Its flexible material also helps protect flooring and reduces slipping without scratching the surface.
Metal spikes are generally more useful when deeper penetration or anchoring is needed, such as on:
Loose soil
Mud
Sand
Snow
Very soft or unstable terrain
Rubber tripod feet are therefore not limited to indoor use. They provide a versatile option for photographers who regularly move between studios, paved locations, grassy areas, and other outdoor shooting environments. However, unlike sharp metal spikes, they are designed primarily to provide grip, cushioning, and surface protection rather than penetrate deeply into the ground.
Match the Tripod Feet to the Ground

No tripod foot can guarantee stability by itself. Wind, leg position, total load, surface conditions, and shooting technique still matter.
Replace Worn or Missing Tripod Feet
Even the correct type of foot becomes less effective when it wears out.
Consider replacing your tripod feet if:
The rubber has worn smooth.
The feet have become hard or brittle.
Cracks are visible.
One foot is missing.
The internal metal is beginning to contact the floor.
A foot spins without tightening.
The tripod rocks on a flat surface.
The three feet provide noticeably different levels of grip.
Replacing all three feet at the same time helps maintain consistent height, grip, and material condition across the tripod.
A Simple Upgrade for Better Grip on Firm Surfaces
If your tripod slips, shifts, or feels less stable during setup, the problem may not be the tripod itself. Worn, hardened, or missing rubber feet can reduce grip on both indoor and outdoor surfaces, making the legs more likely to move during an exposure.
Before replacing an otherwise functional tripod, consider replacing the feet.
Our Universal Anti-Slip Rubber Foot Spikes are available in three thread options—1/4"-20, 3/8"-16, and M8—to fit a wider range of compatible tripods and monopods. Each foot combines a sturdy aluminum-alloy threaded stud with a flexible, anti-slip rubber base that helps improve grip and stability.
The rounded, blunt cone-shaped bottom works on a variety of indoor and outdoor surfaces, including tile, wood, studio flooring, carpet, concrete, pavement, dry rock, grass, firm soil, and mildly uneven ground. The flexible rubber surface conforms to small irregularities while helping cushion the tripod and protect delicate flooring from scratches.
Unlike sharp metal spikes, these rubber feet are not designed to penetrate deeply into mud, sand, snow, or loose soil. Instead, they provide a versatile balance of grip, cushioning, and surface protection—making them suitable for photographers who frequently move between indoor studios and outdoor shooting locations.
Each set includes three matching rubber feet, allowing all three tripod legs to be updated at the same time. This helps maintain more consistent height, grip, and contact across the tripod.
Before ordering, check the thread size of your tripod or monopod carefully. The 1/4"-20, 3/8"-16, and M8 versions are different and cannot be used interchangeably. Do not rely on the tripod brand alone, since different models from the same manufacturer may use different threaded sockets.
Key Product Features

How to Install Replacement Rubber Tripod Feet
Installation takes only a few steps:

Once installed, inspect the feet periodically—especially after travel or outdoor use—to make sure they remain securely attached.
7. Add Weight Carefully
Many tripods have a hook beneath the center column for attaching a bag or additional weight. Used correctly, extra weight can lower the effective center of gravity and help reduce movement.
Used incorrectly, it can make the tripod less stable.
A heavy camera bag suspended in the air may swing in the wind. That movement can transfer directly into the tripod and cause more vibration than it prevents.
If you add weight:
Use a stable weight that will not swing.
Let the bag or weight rest lightly on the ground when possible.
Keep straps from moving in the wind.
Don’t exceed the tripod’s load capacity.
Recheck every leg lock after adding weight.
Make sure the tripod feet remain securely planted.
A small beanbag, weight bag, or low-positioned camera bag may work better than a backpack hanging freely from a long strap.
8. Reduce the Effects of Wind
Wind can affect the tripod, camera, lens, strap, and any accessories attached to the setup. A stable tripod may still vibrate if the rest of the equipment catches the wind.
In windy conditions:
Lower the tripod.
Retract the center column.
Shorten the leg extensions when possible.
Remove or secure the camera strap.
Avoid hanging loose accessories from the tripod.
Use your body or a solid object as a windbreak.
Avoid touching the tripod during exposure.
Wait for a break between gusts before releasing the shutter.
Large telephoto lenses can catch more wind than smaller lenses. Use the lens’s tripod collar when available so the equipment remains better balanced over the tripod head.
Avoid resting your full body weight on the tripod. Lightly shielding it from the wind may help, but pushing against it can introduce movement.
9. Check Every Lock and Connection
A tripod can appear stable while a single loose connection allows the camera to move.
Before starting a critical shot, check:
Tripod leg locks
Leg-angle locks
Center-column lock
Ball-head or pan-and-tilt controls
Quick-release plate
Camera mounting screw
Lens tripod collar
Monopod connection
Threaded tripod feet
The quick-release plate deserves special attention. A plate that is only slightly loose may allow the camera to twist when the shutter is pressed or when a long lens changes position.
If the camera continues to move after every control is tightened, check whether the tripod or head is carrying more weight than recommended. The camera, lens, cage, microphone, monitor, and other accessories all contribute to the total load.
10. Avoid Touching the Camera During Exposure
Pressing the shutter button by hand can introduce small vibrations immediately before the exposure begins.
Several methods can help:
Use the two-second or ten-second self-timer.
Use a wired shutter release.
Use a wireless remote.
Trigger the camera through its mobile app.
Use an electronic front-curtain shutter when appropriate.
Use an electronic shutter when it suits the subject and lighting conditions.
Image stabilization requires a little more care. Some older stabilization systems may behave unpredictably when the camera is completely stationary, while many newer cameras and lenses can detect tripod use automatically.
Instead of following a universal rule, check the instructions for your specific camera and lens. Test the setup if you’re unsure.
For DSLR cameras, mirror movement may also affect certain exposures. Mirror lockup, live view, or an exposure delay can help when the camera supports those features.
Additional Tripod Stability Tips for Long Exposures
Long exposures make small movements more visible, so a few additional precautions can help.
Before opening the shutter:
Confirm that all three feet have solid contact with the ground.
Wait for the tripod to stop vibrating after adjustments.
Secure the camera strap.
Remove any accessories that can swing.
Avoid extending the center column.
Use a remote release or timer.
Stand still and avoid walking near the tripod.
Recheck focus after the setup is stable.
If you’re shooting on a bridge, deck, or wooden platform, wait until nearby people have stopped moving. A strong tripod cannot isolate the camera from a surface that is vibrating underneath it.
Don’t Overload the Tripod
Every tripod and head has a recommended load capacity. Treat it as a limit, not a target.
A setup near its maximum rated load may be more sensitive to wind, adjustment, and imperfect balance. Large lenses can also create leverage that places additional stress on the head, even when the total weight appears acceptable.
For a more secure setup:
Include every accessory when calculating the total load.
Keep the camera balanced over the head.
Use a lens collar with large telephoto lenses.
Choose a head designed for the equipment.
Avoid sudden adjustments while the locks are partially tightened.
Upgrade the support system if it consistently flexes under normal use.
Tripod feet can improve contact with the ground, but they cannot correct an overloaded or structurally inadequate tripod.
Call to Action
A stable tripod setup is rarely the result of one expensive upgrade. It comes from several small decisions working together.
Start with firm ground. Keep the tripod only as high as the composition requires. Extend the thicker leg sections first, lower the center column, secure every lock, manage the wind, and avoid touching the camera during exposure.
Just as importantly, pay attention to the three points where the tripod meets the ground.
Rubber feet are generally the better choice for wood, tile, carpet, concrete, studio floors, pavement, and other firm surfaces. Metal spikes are more useful when the tripod needs to anchor into grass, soil, mud, or similarly soft terrain.
If your original rubber feet are worn, cracked, hardened, or missing, you may not need to replace the entire tripod. Our Universal Anti-Slip Rubber Foot Spike provides a straightforward way to restore grip on compatible tripods and monopods with1/4"-20, 3/8"-16, and M8 threaded sockets.
The set includes three matching rubber feet, allowing you to update all three tripod legs at the same time. The anti-slip rubber surfaces are designed for firm indoor and outdoor ground, while the aluminum-alloy threaded studs provide secure screw-in connections.
Before ordering, check your tripod’s thread size carefully. If it uses 3/8"-16 sockets and you primarily shoot on smooth or firm surfaces, this replacement set can be a small but practical addition to your tripod setup.
Give your tripod a more secure connection to the ground. Explore our Universal Anti-Slip Rubber Foot Spike Set and replace worn or missing feet before your next shoot.
A sharp photograph begins with a stable camera—and a stable camera begins at the ground.